
Debug item-level modifications in DynamoDB with EventBridge Pipes and CloudWatch
Introduction
Have you ever wondered what happens in your DynamoDB table on the item level? Ever wanted to keep a trail in CloudWatch of everything that happens for debugging or audit purposes?
You can use DynamoDB streams to capture item-level modifications made to a table. Previously, to get stream records to CloudWatch, you had to write a Lambda function with custom glue code. Now, with the newly released EventBridge Pipes, this got even easier.
Read on to learn how to set up an EventBridge pipe between a DynamoDB stream and a CloudWatch log group.
Tutorial
This tutorial will show how to set this up through the AWS console.
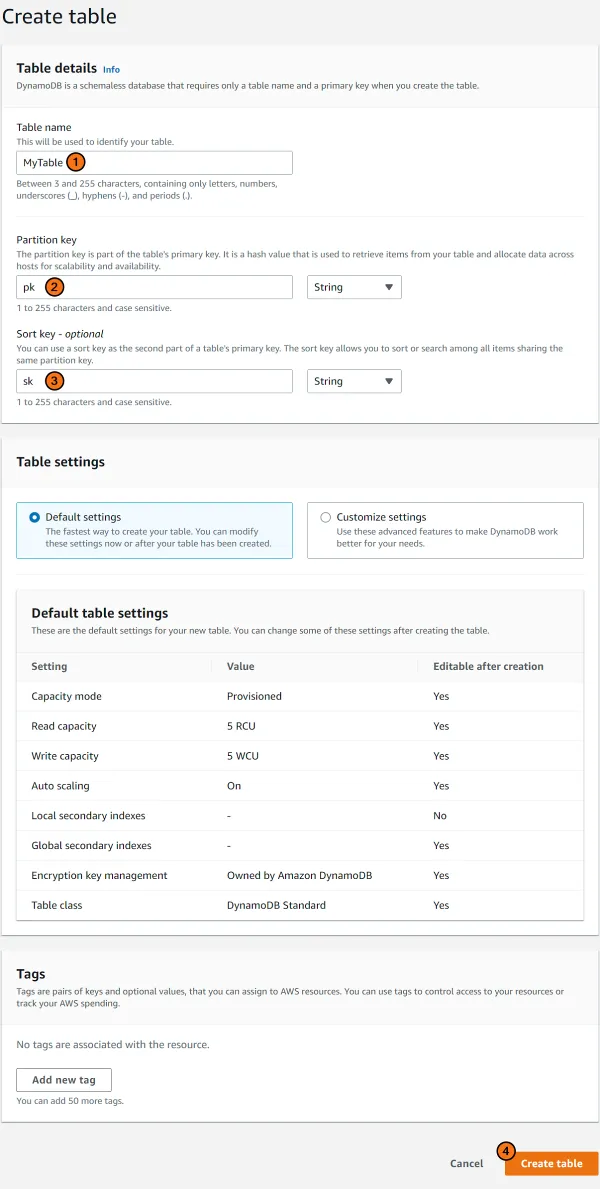
1. Create a DynamoDB table
Head over to the DynamoDB console and click on Create table. The table configuration (name and keys) does not matter for the sake of this tutorial.
- Specify a Table name.
- Specify a name for the Partition key.
- Specify a name for the Sort key.
- Click on Create table.
2. Enable DynamoDB stream
On the left-hand side of the DynamoDB console, click on Tables > Update settings.
- Select your new table.
- Switch to the Exports and streams tab.
- Under DynamoDB stream details, click the Enable button.
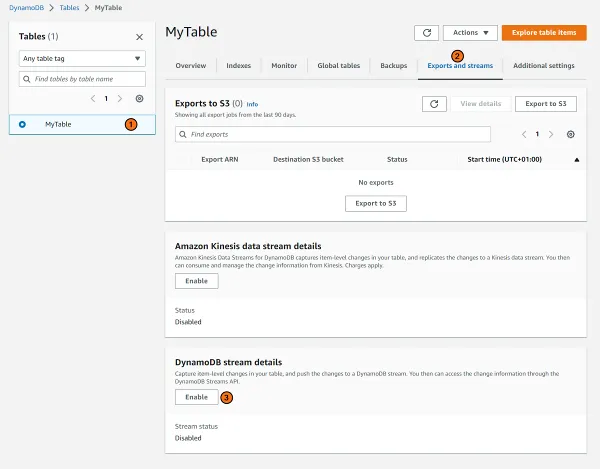
- Select New and old images.
- Finally, click on Enable stream.

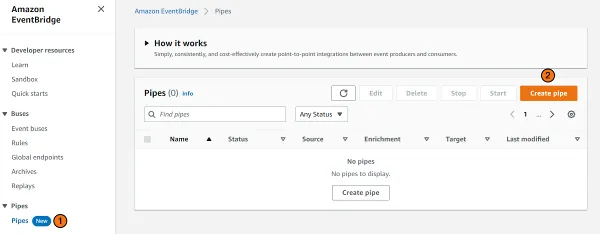
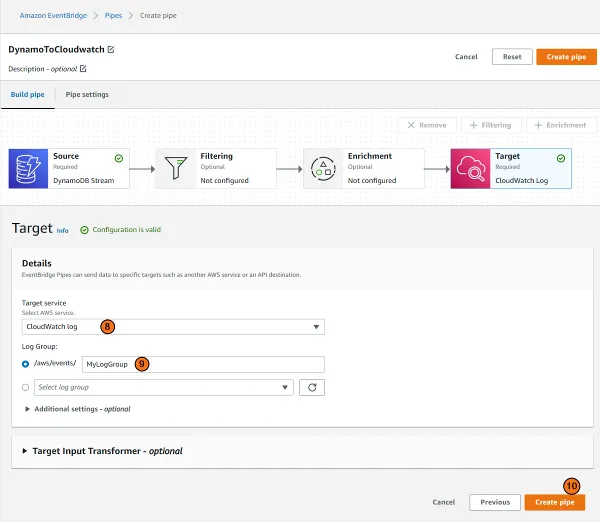
3. Create an EventBridge pipe
Now that you have a table go to the EventBridge console to create a pipe.
- Go to the Pipes console.
- Click on Create pipe.
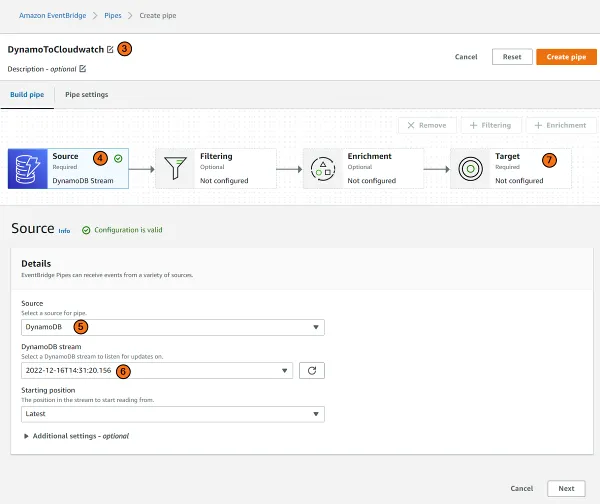
- Give your pipe a name.
- Click on Source to open the source configuration.
- Select DynamoDB in the Source dropdown.
- Select the stream of your table in the DynamoDB stream dropdown.
- Click on Target to open the target configuration.
- Select CloudWatch log in the Target service dropdown.
- Pick a name for your Log Group.
- Finally, click on Create pipe.
4. Make some item-level changes to the table
Add, update, and remove a few items in your DynamoDB table. You can do this from the DynamoDB console.
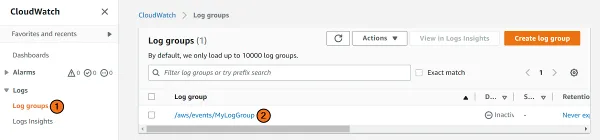
5. Head over to CloudWatch
Head over to CloudWatch to see the work of your pipe in action.
- On the left-hand panel, click on Log groups.
- Find your Log group in the list and click on it.
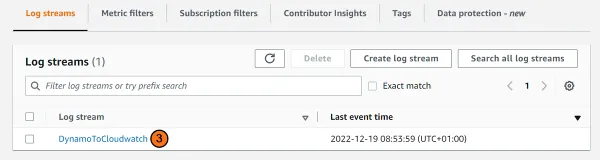
- In the log group, you should find a stream with the name of your pipe. Click on it.
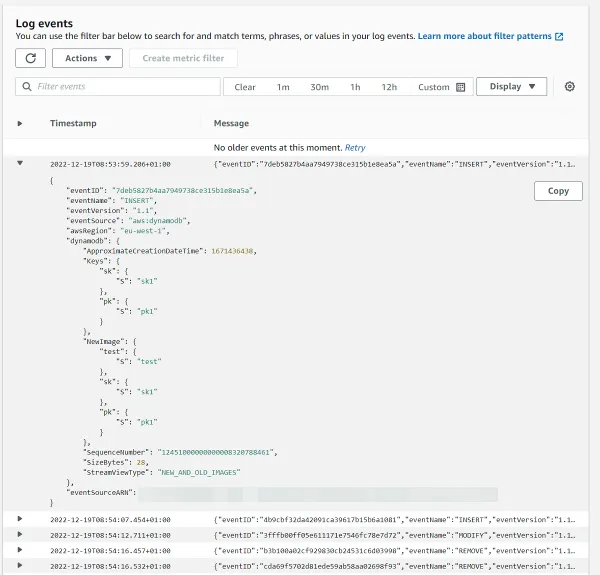
You should now find log entries for all item-level modifications to your table. Below you can see an event’s structure when you insert an item into your table.
The logs are structured, which makes it easy to query and filter log records with Logs Insights in the CloudWatch console.
You can use the following query to find all deleted items:
fields @timestamp, @message| sort @timestamp desc| filter eventName = "REMOVE"Or, if you are interested events for a specific key:
fields @timestamp, @message| sort @timestamp desc| filter dynamodb.Keys.pk.S = "pk1"Summary
This post was a short but, hopefully, useful one. Using pipes to capture all item-level modifications made to a DynamoDB table in CloudWatch can help you debug your solutions. It could also be used for auditing when you require a log on all item-level changes made to a table. Best of all, it required zero modifications to the application that writes to the table.